整体步骤
- 检测marker
- 为他计算计算6DOF pose
- render 3D 图片
- 把图片和marker组合在一起
Ex1:检测marker的四个基础点
打开相机
- 注意初始化 videocapture 应该是在while的循环之前的
thresholding
- 函数 cv::threshold(…)
- src
- dst
- thres的值,也就是阈值的边界值 double
- maxval,在最后一个参数是binary的时候,确定binary的最大值
- type,二值图,反二值图,保留原色等乱七八糟的
- 注意binary之前要先 cvtcolor到灰度图!!!
cv::adaptiveThreshold <- 试试这个函数的作用,不用自己设置threshold了
- 并不想set这些hypers manully
- 除了寻常需要设置的东西之外,还需要
- adaptiveMethod
- block size(需要被用来计算threshold的value)
- C:需要被从整体中减去的一个constant
有些变量的地方用到了const <- 感觉应该学学老师的编程风格
detect connected components
cv::findContours
- 函数
- 图片
- contours
vector<std::vector<cv::Point> > - hierarchy
vector<cv::Vec4i>,contour的拓扑学信息 - mode (注意在这里选择要外轮廓还是内外都要)
- method:估计contour的方法
- offset(当从ROI提取轮廓然后在整张图片里面分析的情况)
去除过小的contour
1 | vector<vector<Point>> :: iterator itc = contours.begin(); |
- 老师的代码里面是先进行了估计,计算了bound的面积,然后根据
- 面积大小,占整张图片的百分比
- 几个角
cv::isContourConvex:检查这个marker的凸性,毕竟形状不能是凹的,直接输入这个多边形的array,输出的就是bool
估计contour的多边形
- approxPolyDP
- 被估计的contour
- 估计出来的的多边形
- 估计的参数,影响估计的精度 ->
const auto epsilon = 0.05 * cv::arcLength(contour, true);- 计算一个curve的长度
- closed,估计出来的多边形是不是封闭的
画出来只有四个角的多边形
drawContours()
- 图片
- 需要画的轮廓s (注意这是这张图片里面的所有轮廓)
- 需要画的index
- thickness 线的
- 线得种类
- Optional information about hierarchy.
- maxLevel
- Maximal level for drawn contours. If it is 0, only the specified contour is drawn. If it is 1, the function draws the contour(s) and all the nested contours. If it is 2, the function draws the contours, all the nested contours, all the nested-to-nested contours, and so on. This parameter is only taken into account when there is hierarchy available.
- offset:可选
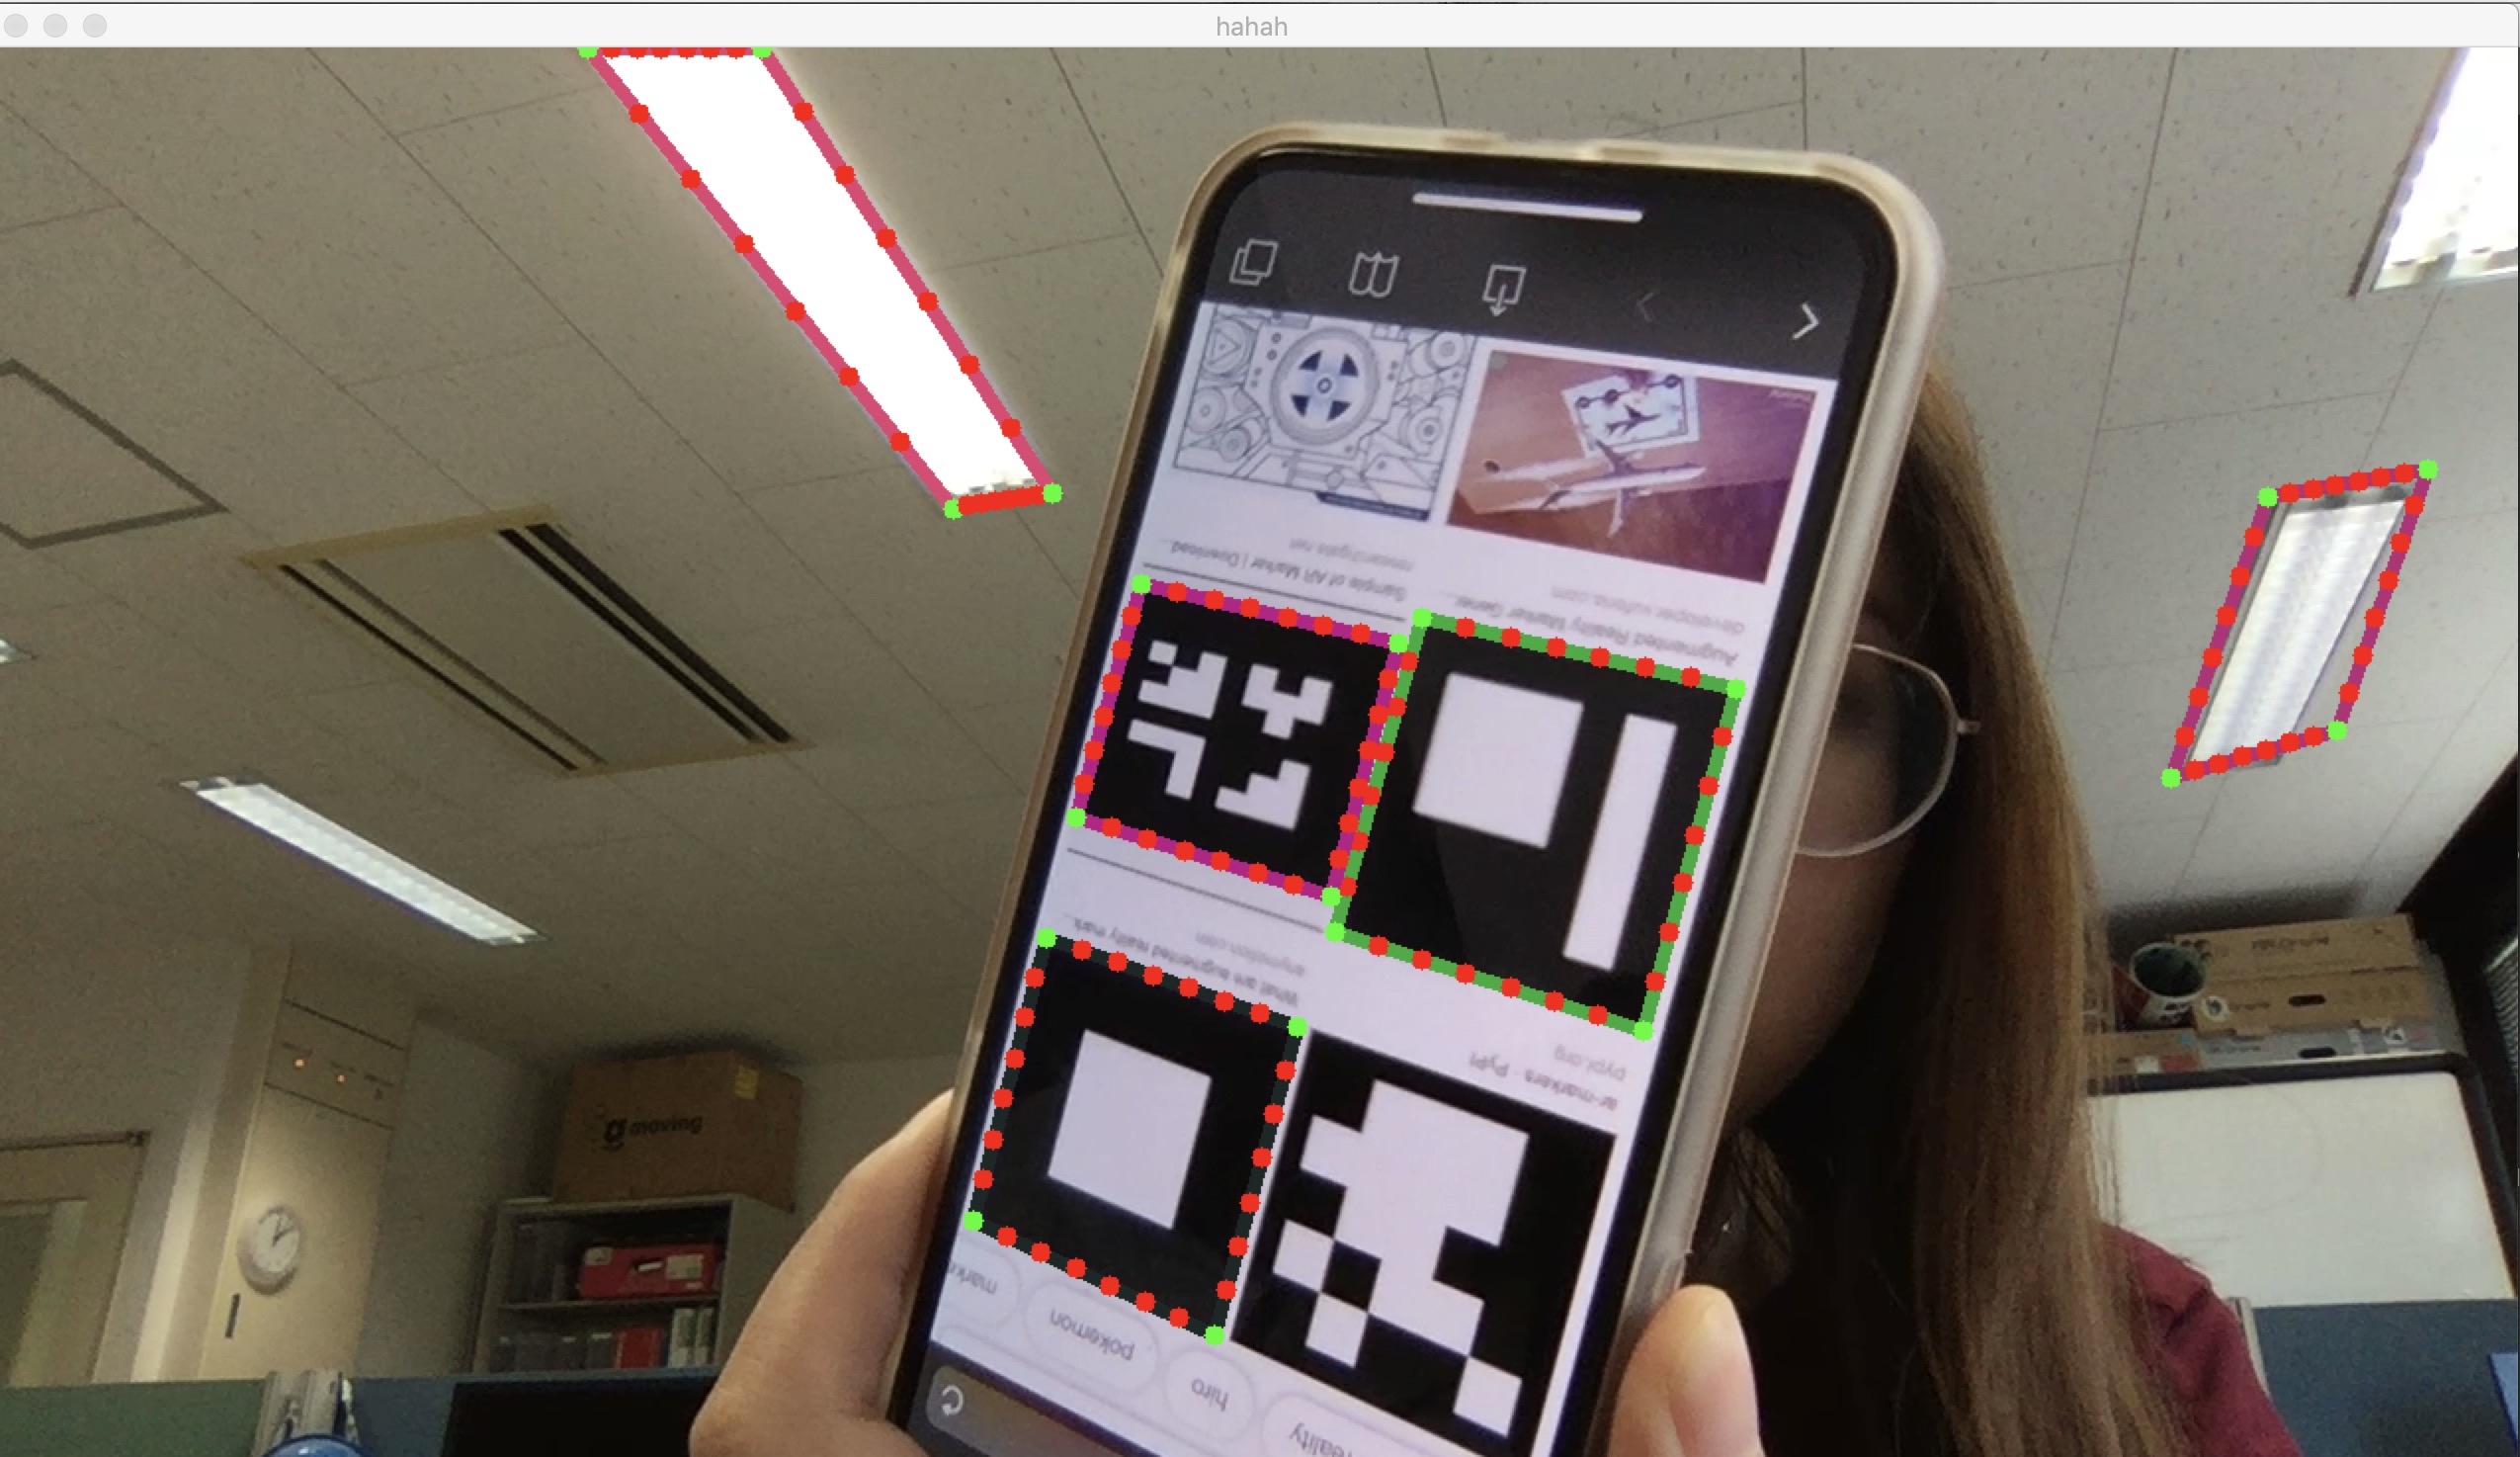
老师用的方法是计算了各个点和计算了各个边,所以可以画出来边上还有好多点的结果
- 一种神奇的定义颜色的方式,直接随机出来
const cv::Scalar kEdgeColor(rand() & 255, rand() & 255, rand() & 255);-> 这样的话出来的每一帧的框的颜色都会改变
![] - 用
cv::polylines来画出来polys的curve,并且要画closed的
- 一种神奇的定义颜色的方式,直接随机出来
- 画出来图片的delimiters(为下一步做准备)
- 目的:从一个corner到另一个corner的方向vector
- 步骤
- 首先在corner上面用circle画出来
- 检查每个edge
- 每个edge上有6个点,然后计算两个corner之间的dx和dy的方向,除以部分的数量(7)就是每个小块的方向,然后把这个小块重复6次
1
2
const double dx = (double)(contour_approx[(i+1)%kNumOfCorners].x-contour_approx[i].x)/(double)(kNumOfEdgePoints+1);
const double dy = (double)(contour_approx[(i+1)%kNumOfCorners].y-contour_approx[i].y)/(double)(kNumOfEdgePoints+1);
第一部分结束后的完整代码
1 |
|
第一部分运行之后的结果

Ex2. find marker precisely
- 现在有corner,corner之间的line,这个line还被分成6个部分(
~因为大小是6x6?的= 两个边 + 中间四个格??~) - 光检测边缘是不够的,想知道这个边缘实际是什么样子的
- 现在只知道虚线的部分是什么样子的
- 并且现在已经把每个边都分部分了 -> 画出来垂直的分块的线,找到这个线和颜色突变的交点,重新画出来新的线(实线)
- 希望找到颜色突变的地方
- 但是实际上的颜色不是突变的,是白 -> 灰 -> 黑

- 但是实际上的颜色不是突变的,是白 -> 灰 -> 黑
操作步骤
- 预准备
- 在每个side找六个点
- 在边上提取三个像素宽度的stride
cv::GetQuadrangleSubPix()-> 不会用!- 从输入的array得到四边形
- src输入图像
- dst提取出来的四边形
- 变换的矩阵
- Sober operator
- 图像处理里面的常用算子 -> 主要用于边缘检测,用来运算与灰度的相似值
- 包含两组3x3的矩阵,中间的3x1的0,分别为横向和纵向,另外两面对称
- 然后与图片做卷积,分别计算x方向和y方向的灰度值

- 然后把Gx和Gy求平方和的根,最后得出来这个像素点的灰度值(或者有的时候也可以用绝对值来计算,这样计算的消耗小一点)
- 步骤
- 在每个stripe里找到最高的change
- 对这个change和她周围的点(在原来的曲线上),找到一个新的二次曲线
- 找到这个曲线的顶点(一阶导数)
如何得到图片的subpixel color
不是原来的方方正正的,而是沿着那个直线方向的新的方方正正
- 就是取各个颜色在面积上的平均,

老师的代码
sublixSampleSafe->- 这个函数输入测试的图片(gray和已经得到的subpix点
- 把这个点求floor,int,得到基准点,然后检查是不是在图片里面(不是的话返回gray,127)
- 如果在图片里面的话计算出来实际的坐标
确定marker的id

corner detection
- exact sides
- 找到沿着刚才计算出来6个点的一条线
fitLine
- 找到沿着刚才计算出来6个点的一条线
- precise corner
- 从各个边的交点计算精确的corner(因为各个边已经很精确了)
Marker Rectification
- 创建一个6x6 pix的ID图片
- (-0.5,-0.5) to (5.5,5.5)
- 从原图片的perspective warp到Id image
cv::getPerspectiveTransform or cv::warpPerspective- 需要找到的是linear transformation